

Nothing is written to Webflow during the wizard. The connection is created as a draft and stays inert until you approve the first preview.
Step 1 — Destination
Pick the Webflow site, then the CMS collection to sync into.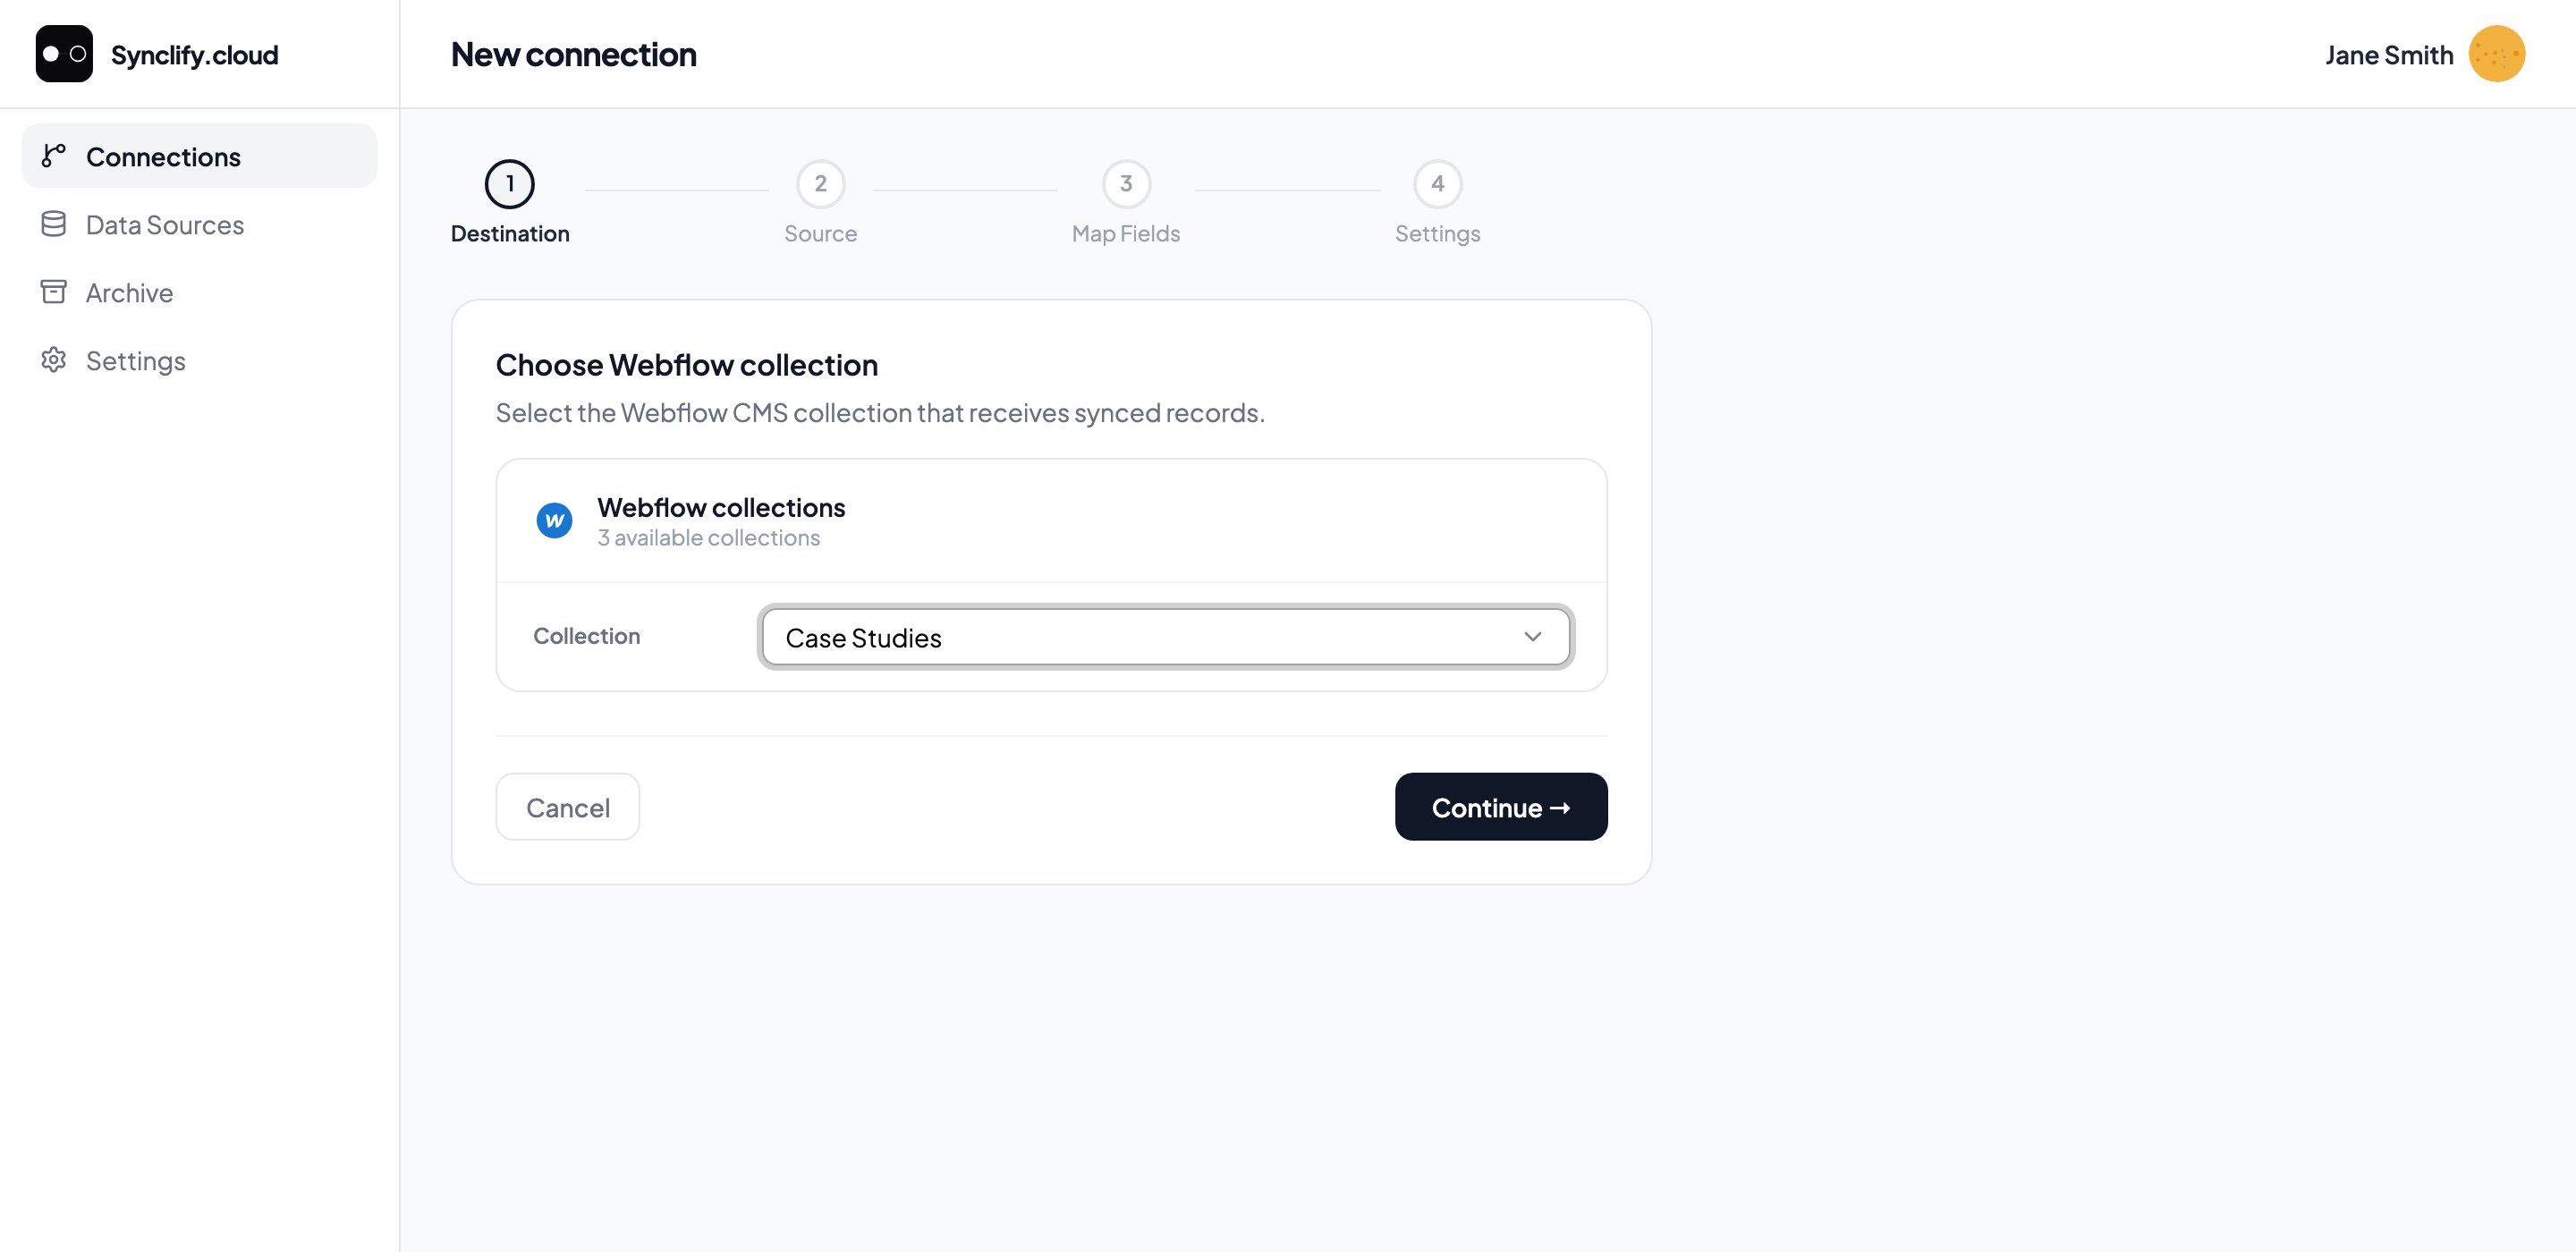
Each collection shows its field count, so you can tell them apart at a glance.
Step 2 — Source
Pick the provider, then the specific resource.- Airtable — choose a base, then a table.
- Google Sheets and Notion — visible but disabled, both marked Coming soon.
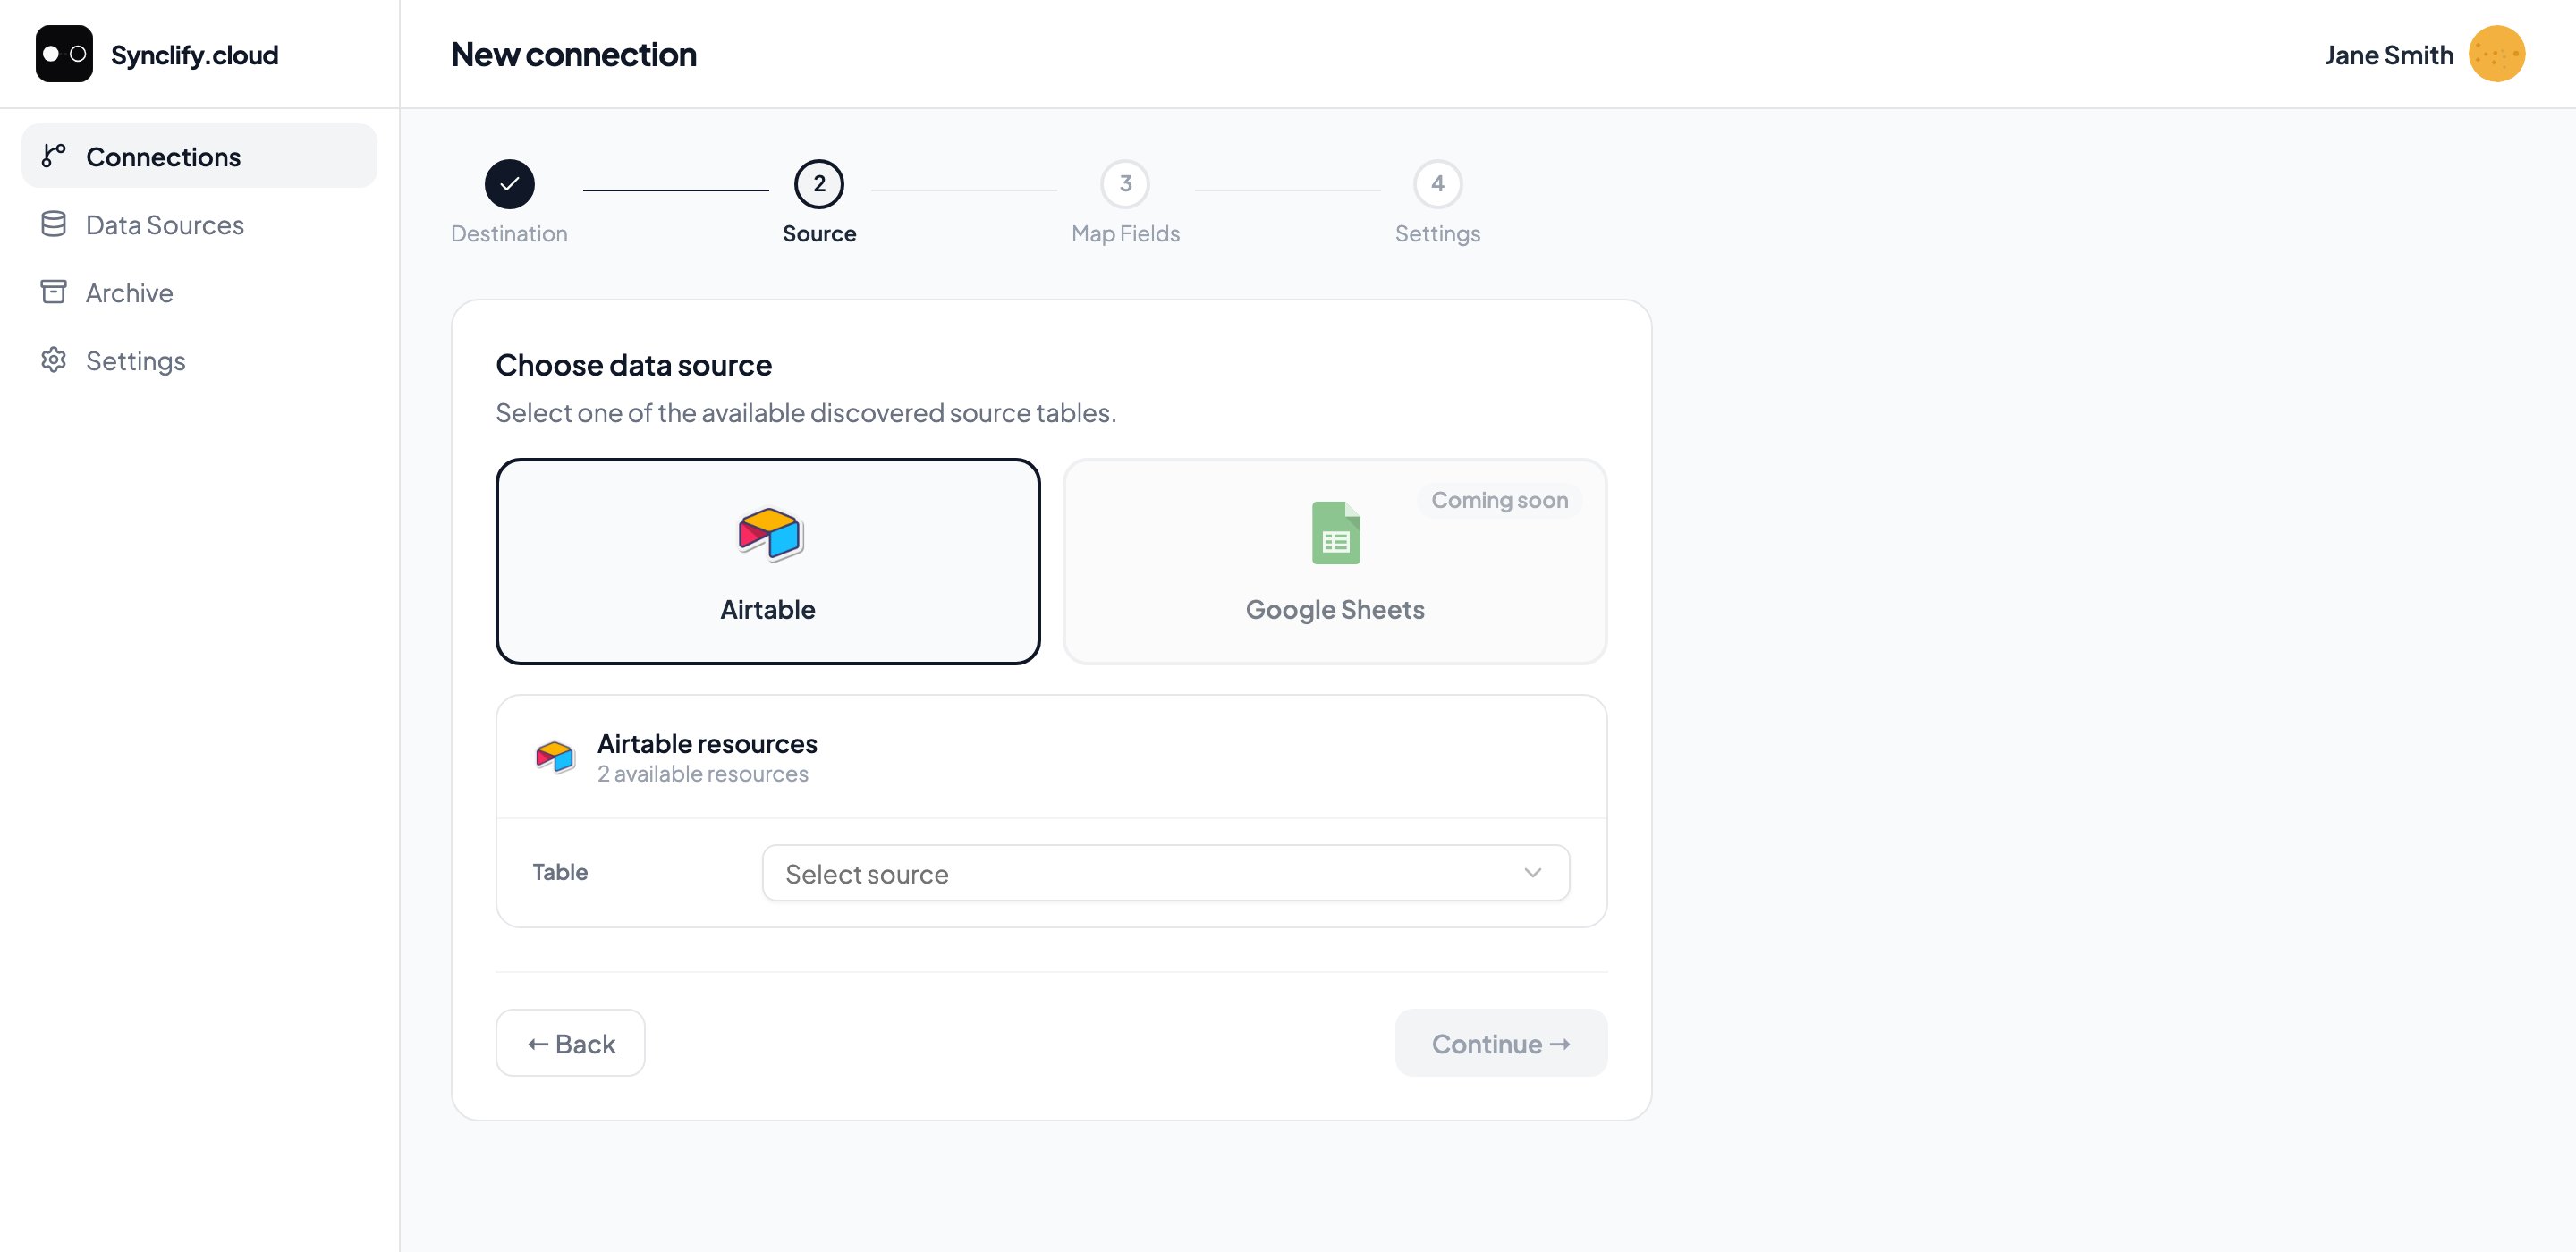
Select Airtable, then pick the table to sync from.
Step 3 — Map fields
Synclify auto-maps on entry, matching source column names to Webflow field names and known aliases. It takes a moment. Auto-mapping is deliberately conservative. It matches on name evidence only — an exact key, a full token match, a known synonym — and never on field type or position. It then assigns globally: the strongest pair is settled first and both fields are consumed, so one source column can never be auto-mapped onto two Webflow fields. A column calledName does not land on Job Title just because nothing better was found.
Manual mapping has no such restraint. Anything auto-mapping declined to guess, you can still map yourself.
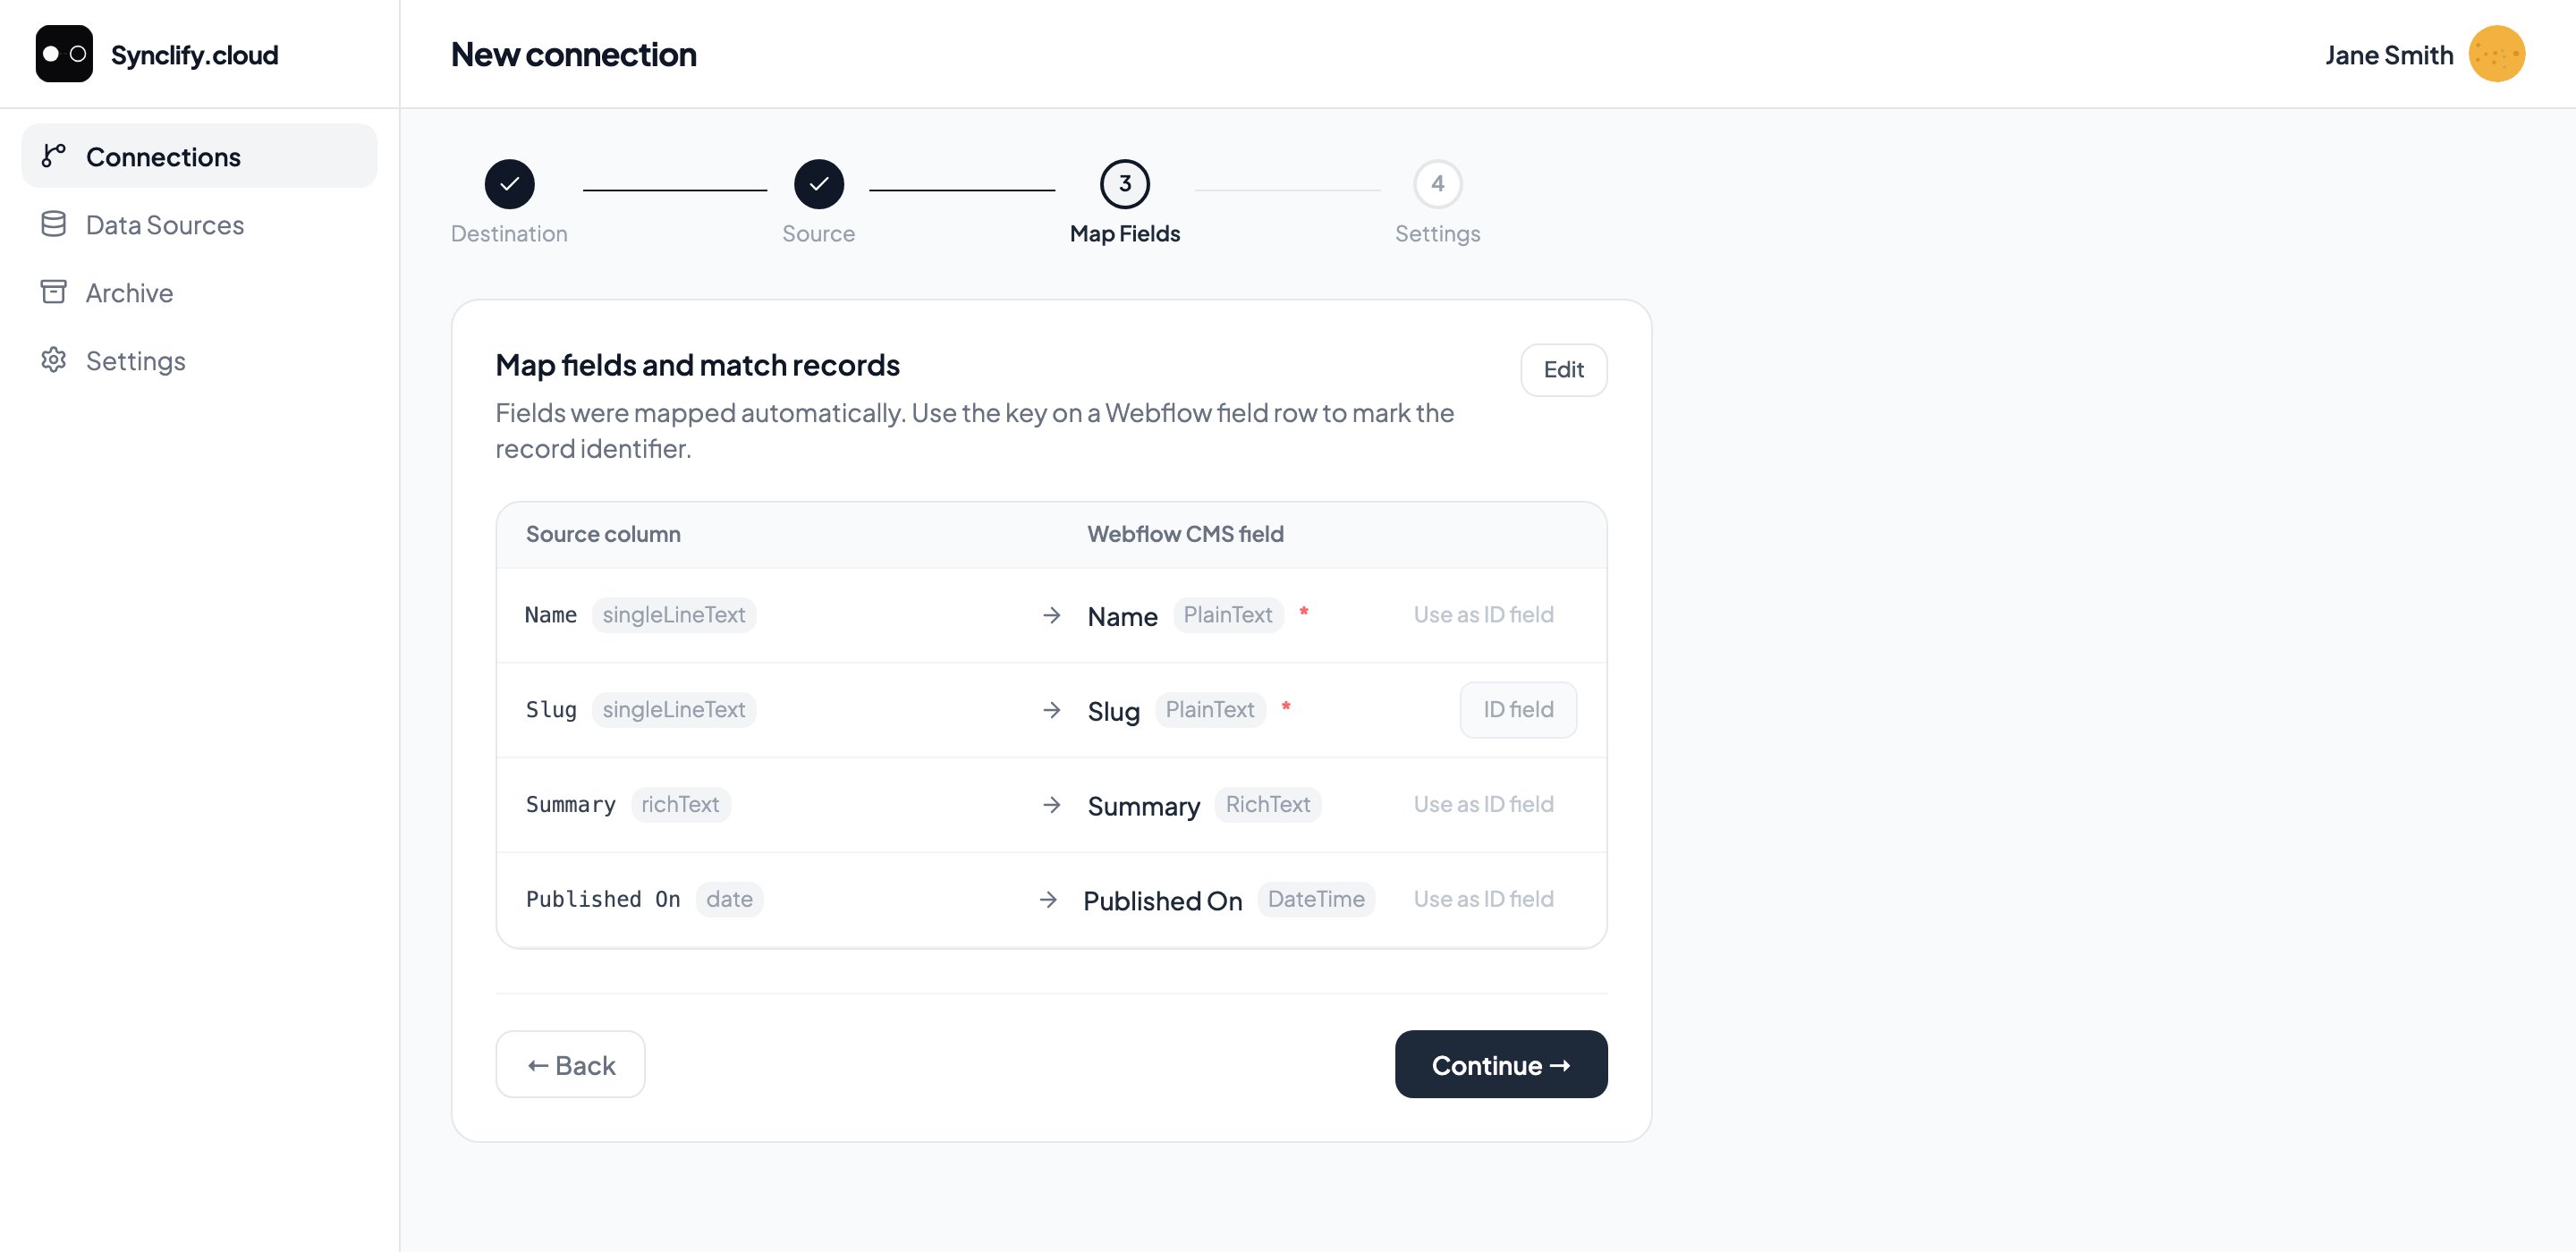
Each Webflow field shows its type (PlainText, Switch, Reference…). Unmatched fields read '— not mapped —'; the row marked ID field is the record identifier.
- Review each mapped pair and correct the wrong ones.
- Set the ID field — required.
- Add mappings for columns auto-mapping missed, and remove ones you don’t want synced.
Step 4 — Settings
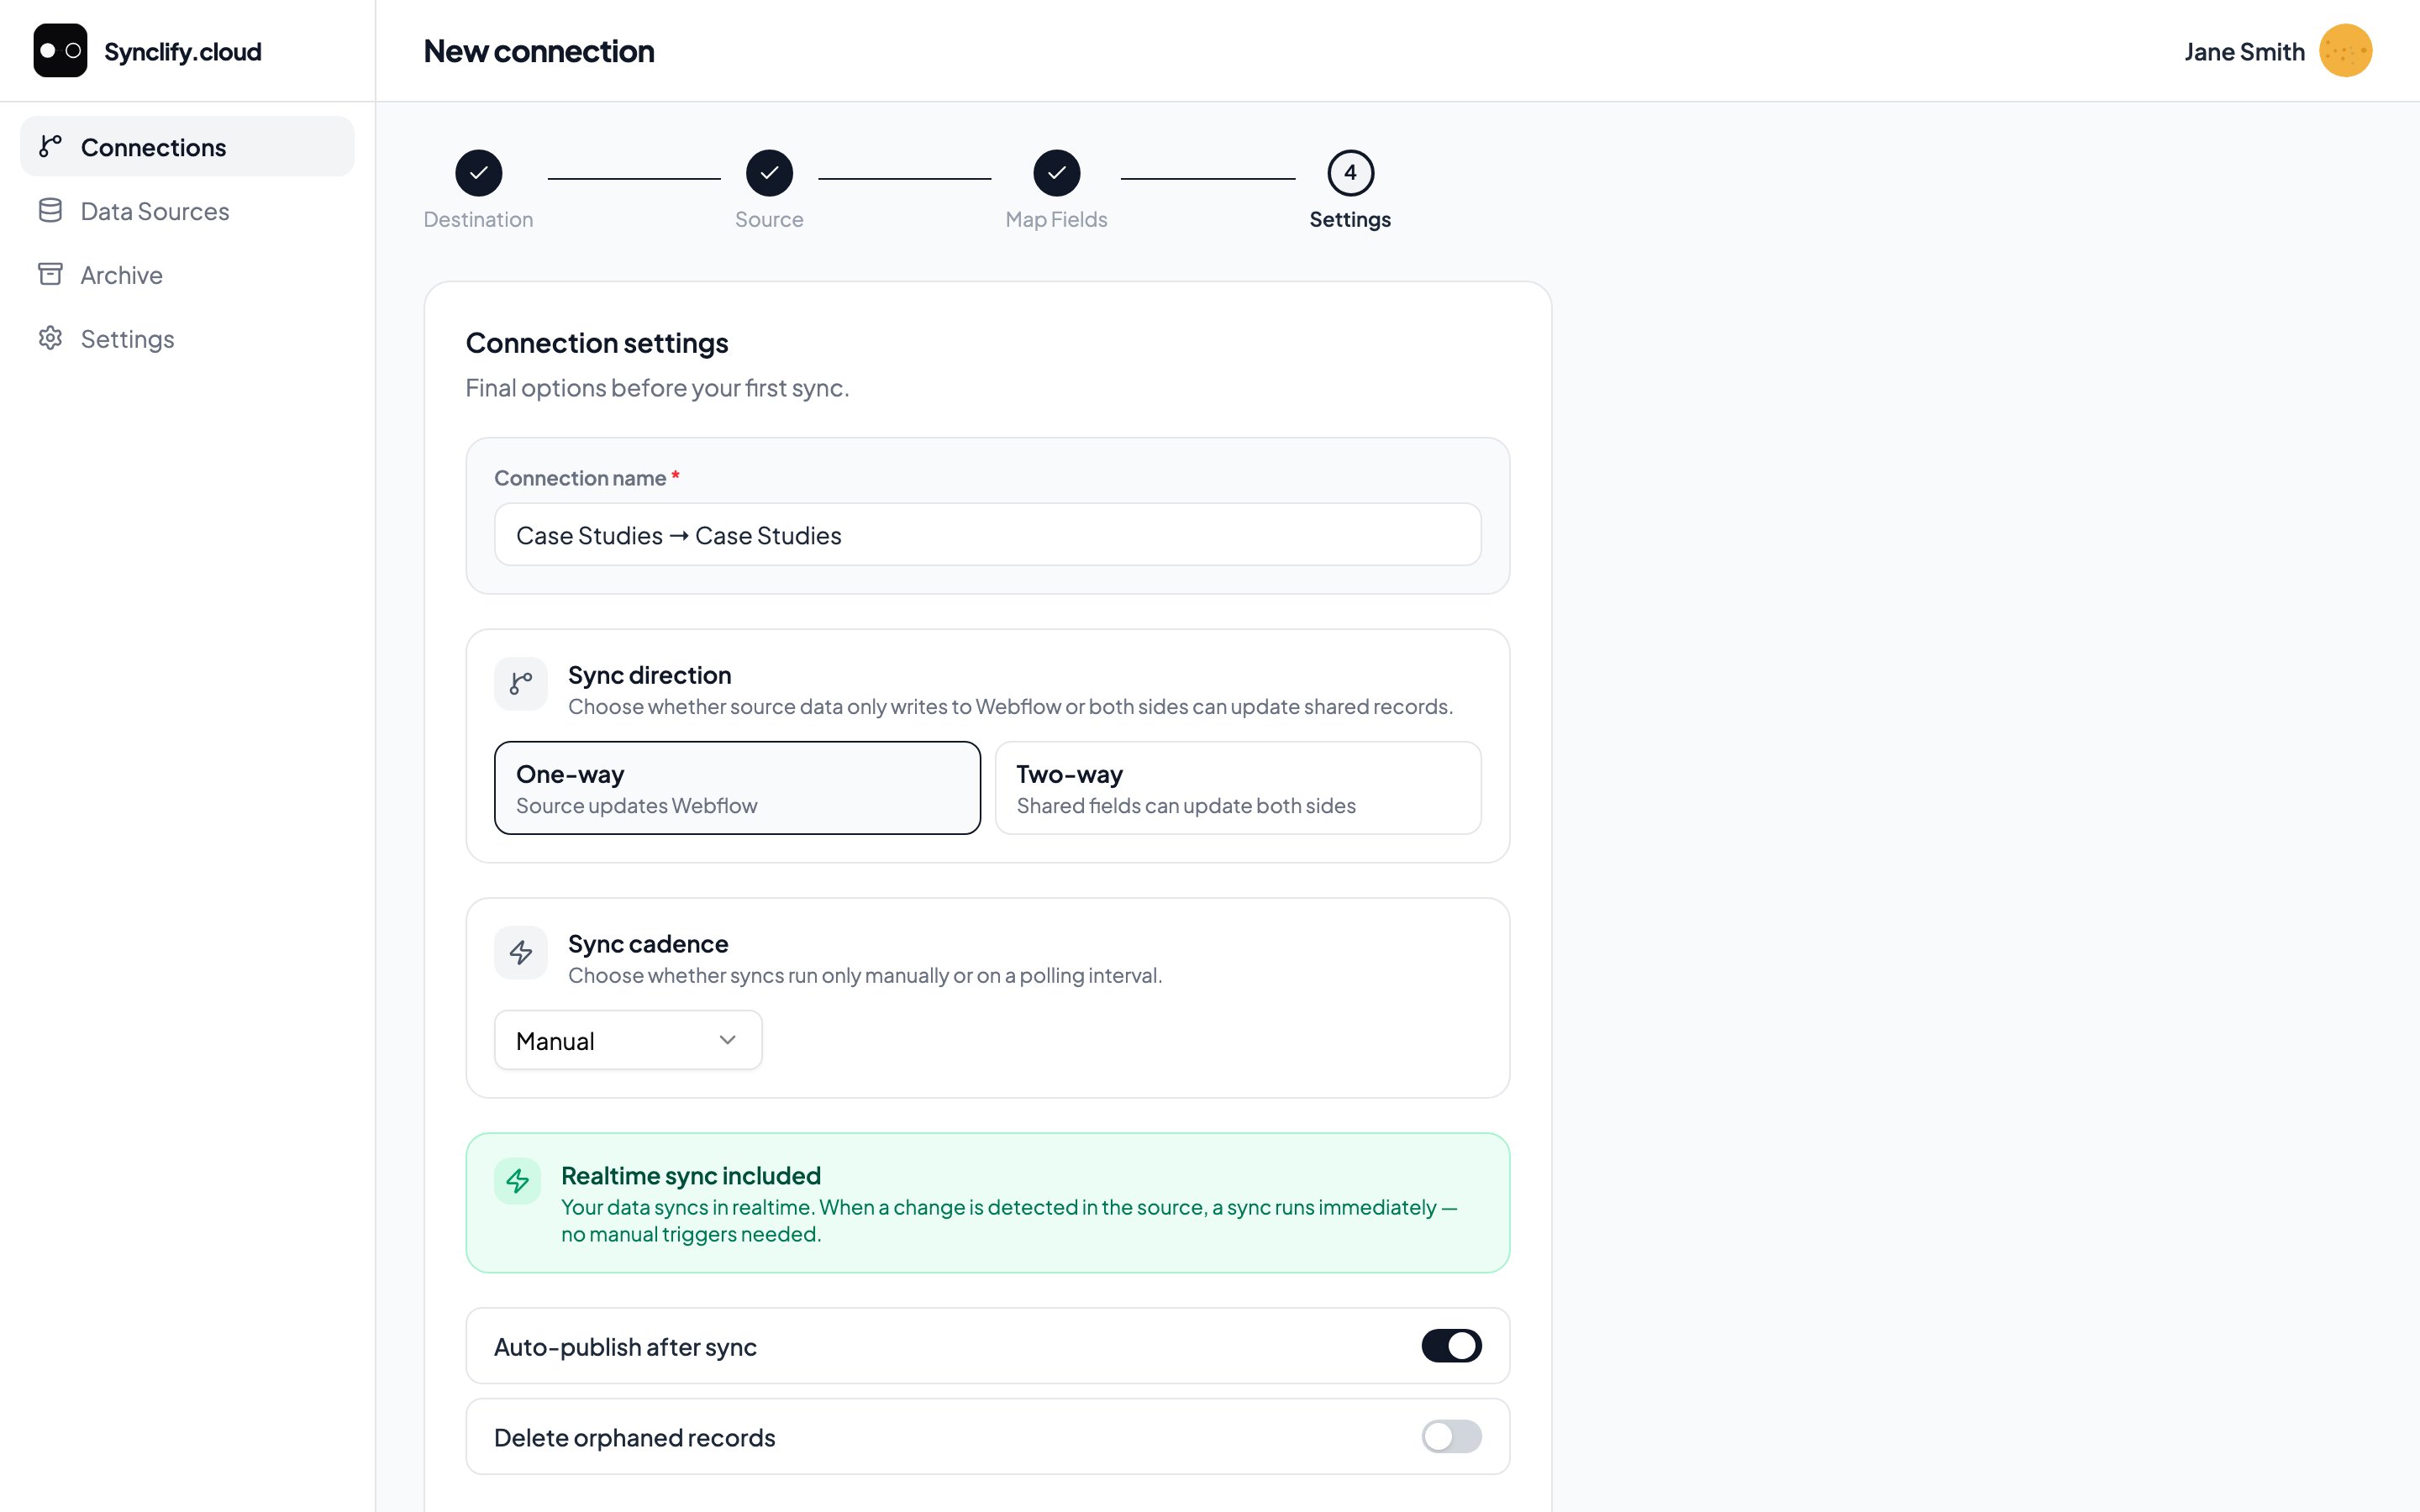
Name the connection, set direction and cadence, then Create connection. Realtime is included regardless of cadence.
required
How the connection appears in lists, history, and the delete confirmation. Use something you’d recognize under pressure —
Blog posts → Webflow, not Connection 3.one-way | two-way
default:"one-way"
One-way (
Source updates Webflow) — Airtable is the source of truth; Webflow edits to mapped fields are overwritten.Two-way (Shared fields can update both sides) — edits flow both ways, and you get per-field ownership.manual | polling
default:"manual"
Manual — syncs only when you click Sync now.Polling — a fallback scan every N minutes, hours, or days.Realtime sync runs regardless of this setting. Polling exists to catch what webhooks miss.
toggle
default:"on"
On: synced items are published live. Off: they land in Webflow as staged changes for someone to publish by hand.
toggle
default:"off"
Off: a Webflow item whose source row disappeared is left alone.On: it is permanently deleted from Webflow.
When creation is blocked
Two things can stop a connection before the wizard’s final step, and both tell you before you click rather than refusing afterwards.Plan limit reached
Plan limit reached
Your plan caps how many connections can be active at once. When you’re at the cap, a banner names the limit and Create is disabled. Pause or archive a connection, or upgrade.
Billing needs attention
Billing needs attention
When the workspace’s billing state would cause activation to be refused, an inline notice appears up front — with a pre-filled support draft — instead of letting you build a connection that cannot be activated. See Billing.
The wizard is a write action. A viewer who types the URL is redirected rather than shown a form they cannot submit — see roles.
If a provider’s resources won’t load
A per-account banner shows the provider’s own message rather than an empty dropdown. If Airtable has hit a monthly API limit, that is what it says — which is far more useful than “no tables found”.Leaving mid-wizard
Your progress is saved to this browser as you go, so reloading the page resumes exactly where you were. Navigating away deliberately still prompts:Leave connection setup? Your setup will be discarded and you’ll have to start over.